
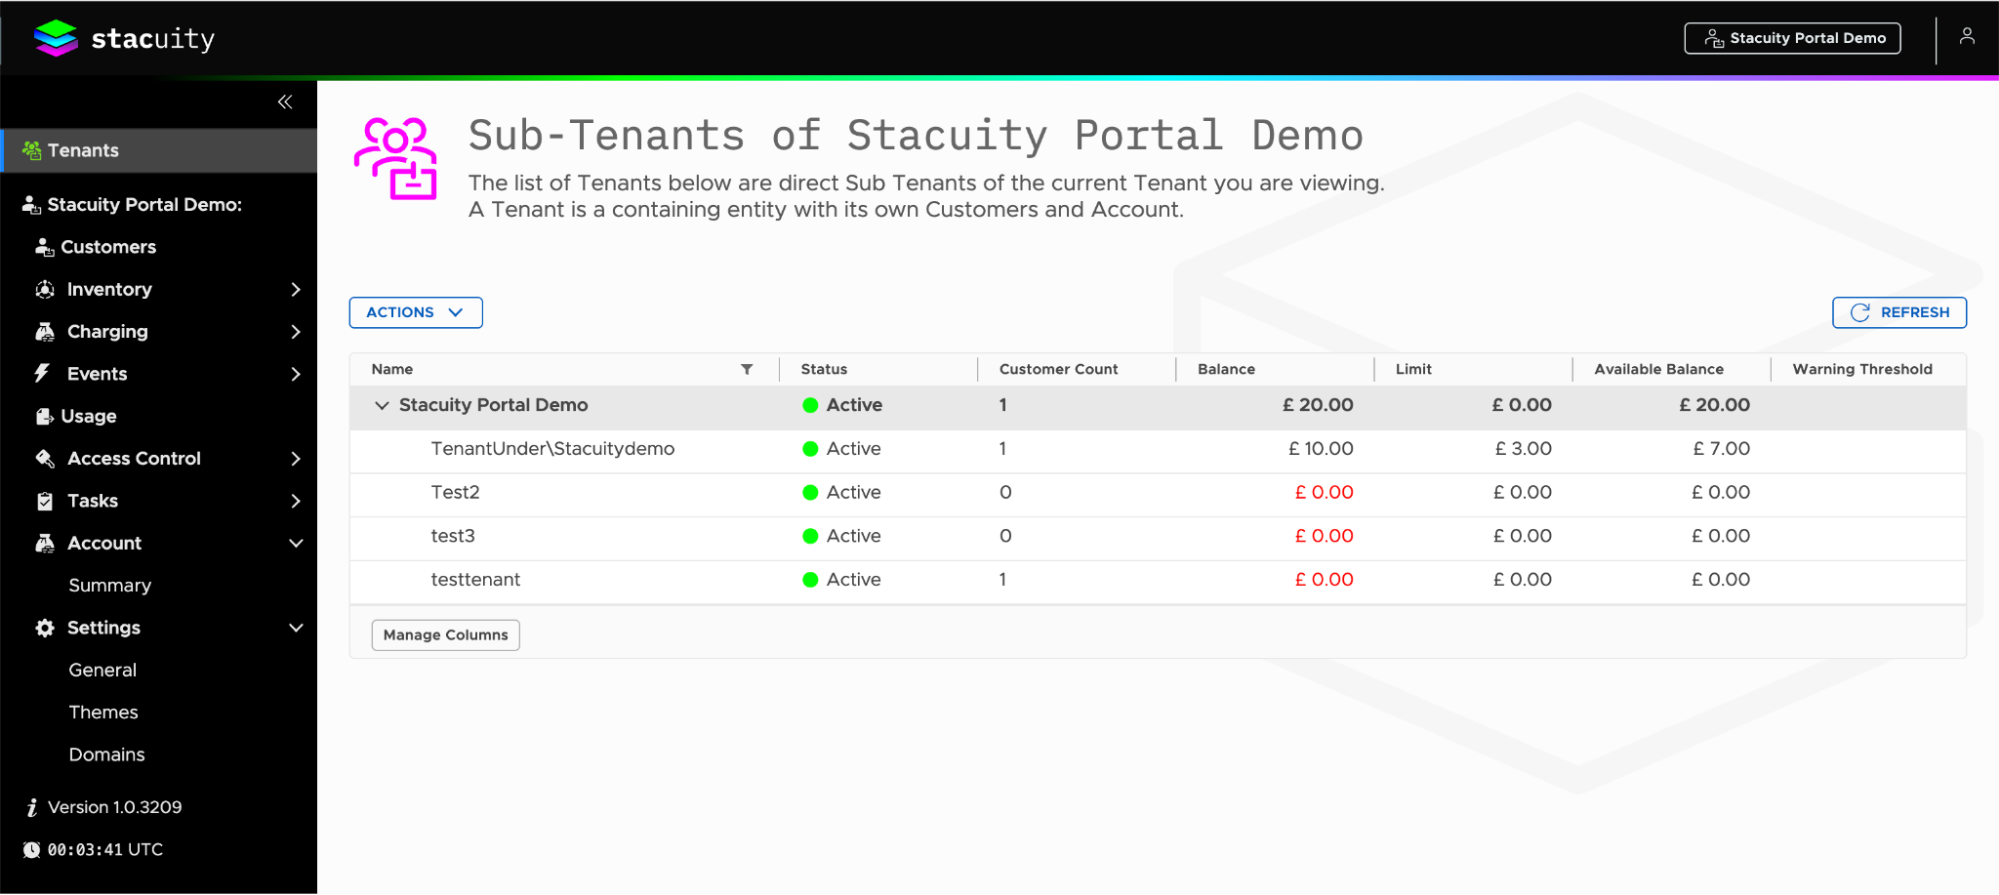
Sub-Tenants
Creating a Sub-Tenant
Creating sub-tenants lets you delegate management or organize different business units. You might create regional sub-tenants, or separate tenants for different product lines.
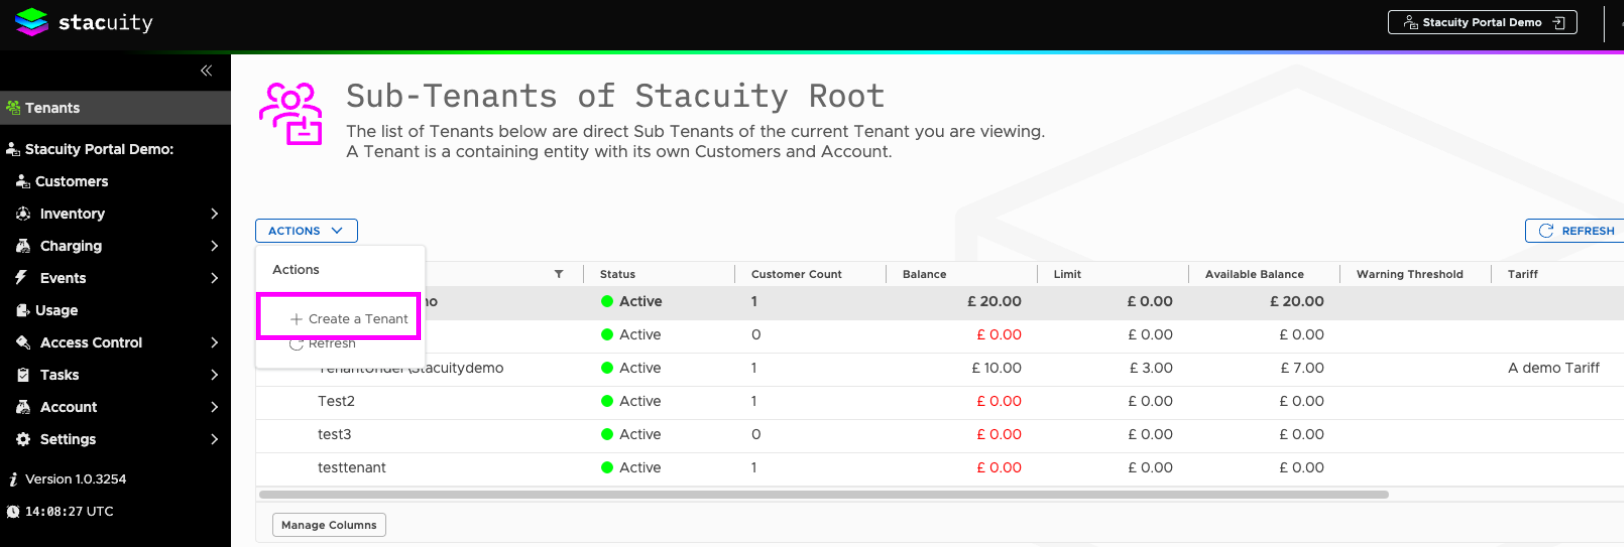
Step-by-Step Process:
- Navigate to the Tenants menu from your main navigation
- Select the parent tenant where you want to create the sub-tenant
- Click Actions → Create a Tenant
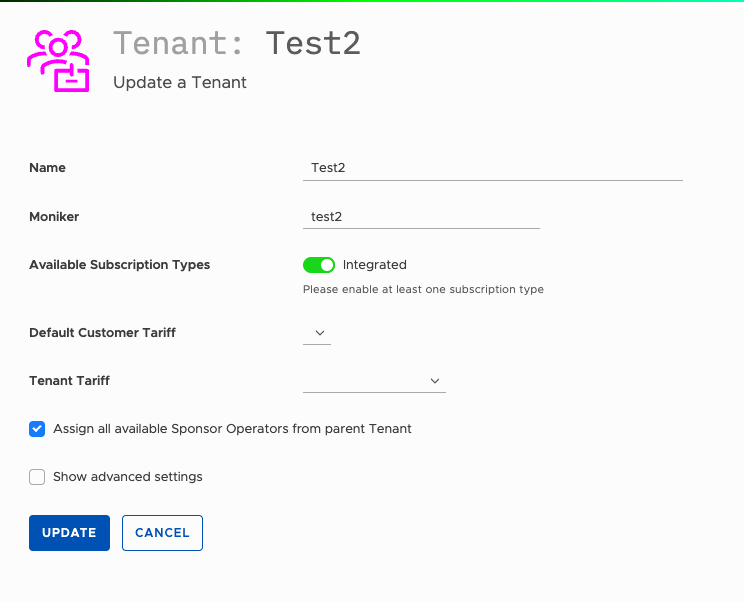
- Fill in the required information:
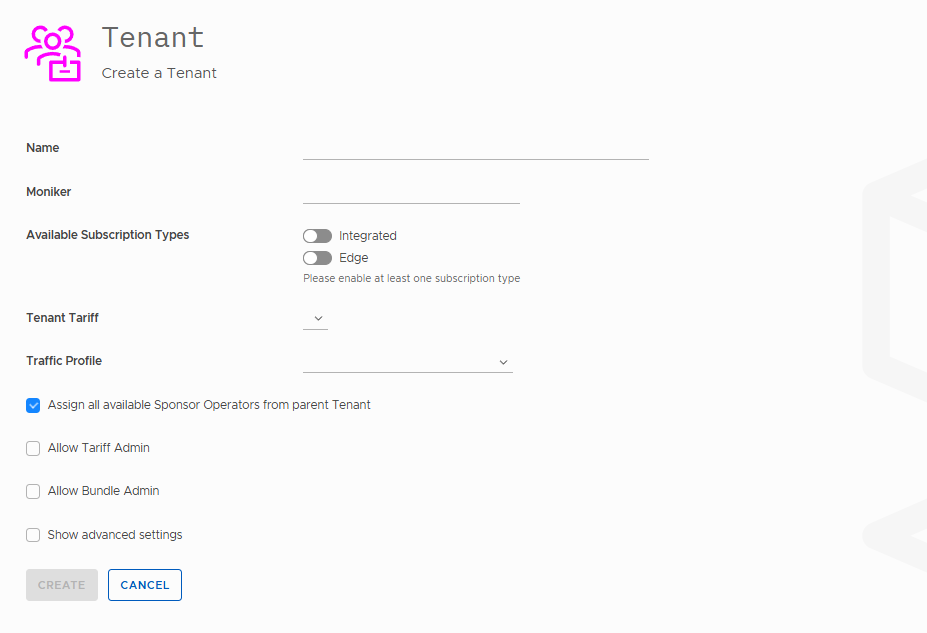
| Name | Description | Example |
|---|---|---|
| Tenant Name | Descriptive name for the organization | Stacuity |
| Moniker | Unique identifier (keep it short and memorable): Moniker must contain only lowercase alpha, numeric, underscore or hyphen characters. | stacuity |
| Available Subscription Types | Toggle Integrated on (required for tenant functionality). | |
| Default Customer Tariff | Select a default tariff to automatically apply to sub-customers under this tenant. | |
| Tenant Tariff | Select a tariff to apply to this tenant’s own usage. Please note: If you leave this blank and do NOT assign a tenant tariff to a sub-tenant, they essentially get "free" usage from your perspective as the parent tenant. | |
| Traffic Profile | Defines bandwidth throttling levels, setting maximum upload/download speeds from 1 Gbit/s down to 64 Kbit/s. | 1 Gbit/s up / 1 Gbit/s down |
| Sponsor Operators | Available Sponsor Operators from the parent tenant will be accessible to the sub-tenant if this option is enabled. |
To establish proper billing between tenant levels:
- Create or select an appropriate tenant tariff
- Assign it to the sub-tenant in their tenant definition
- This creates the rate structure for charging them based on their customers' usage
(Optional) Click Show advanced settings to locate the Customer Top-Up URL field.
- Use this field to define a custom payment or top-up URL for the tenant, which can include dynamic tokens that are replaced at runtime.
- Click Create to establish the new sub-tenant
Managing your Sub-Tenants
Once you've created one or more sub-tenants, you can configure various settings that will apply to their operations:
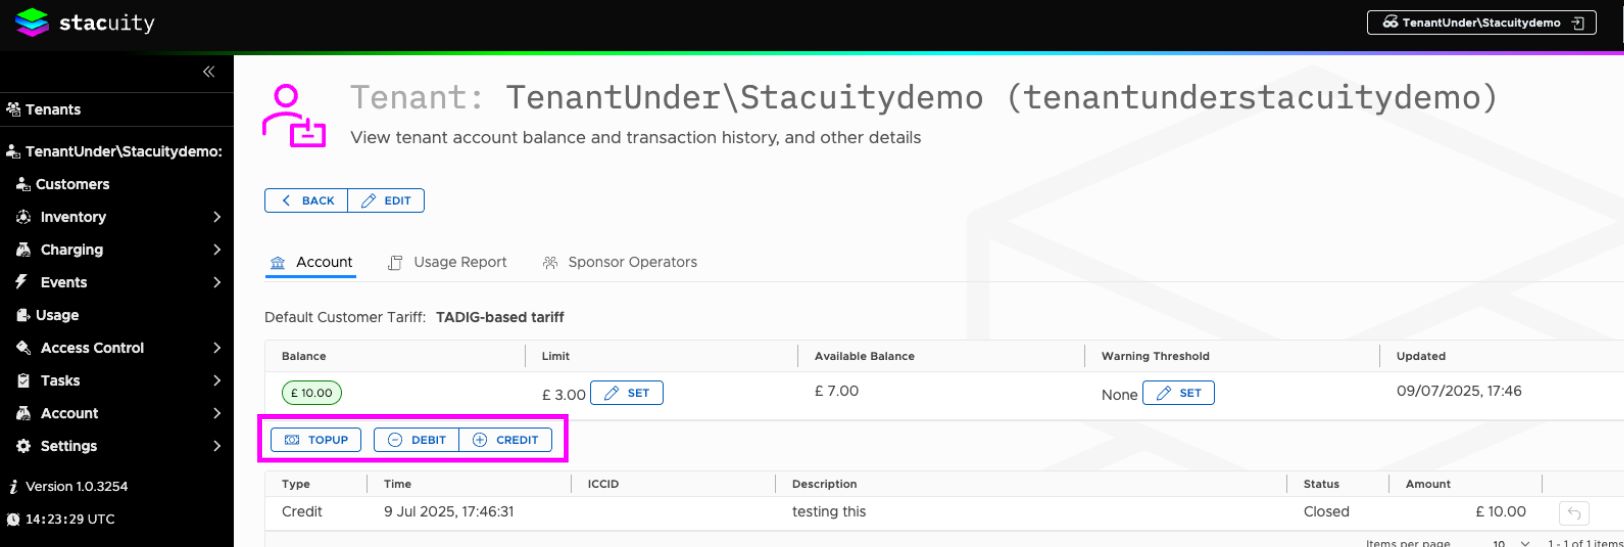
View Tenant account balance, transaction history and other details
Navigate to your tenants and click the View icon under the action column for the sub-tenant you want to manage. You will now be in the sub-tenant summary page.
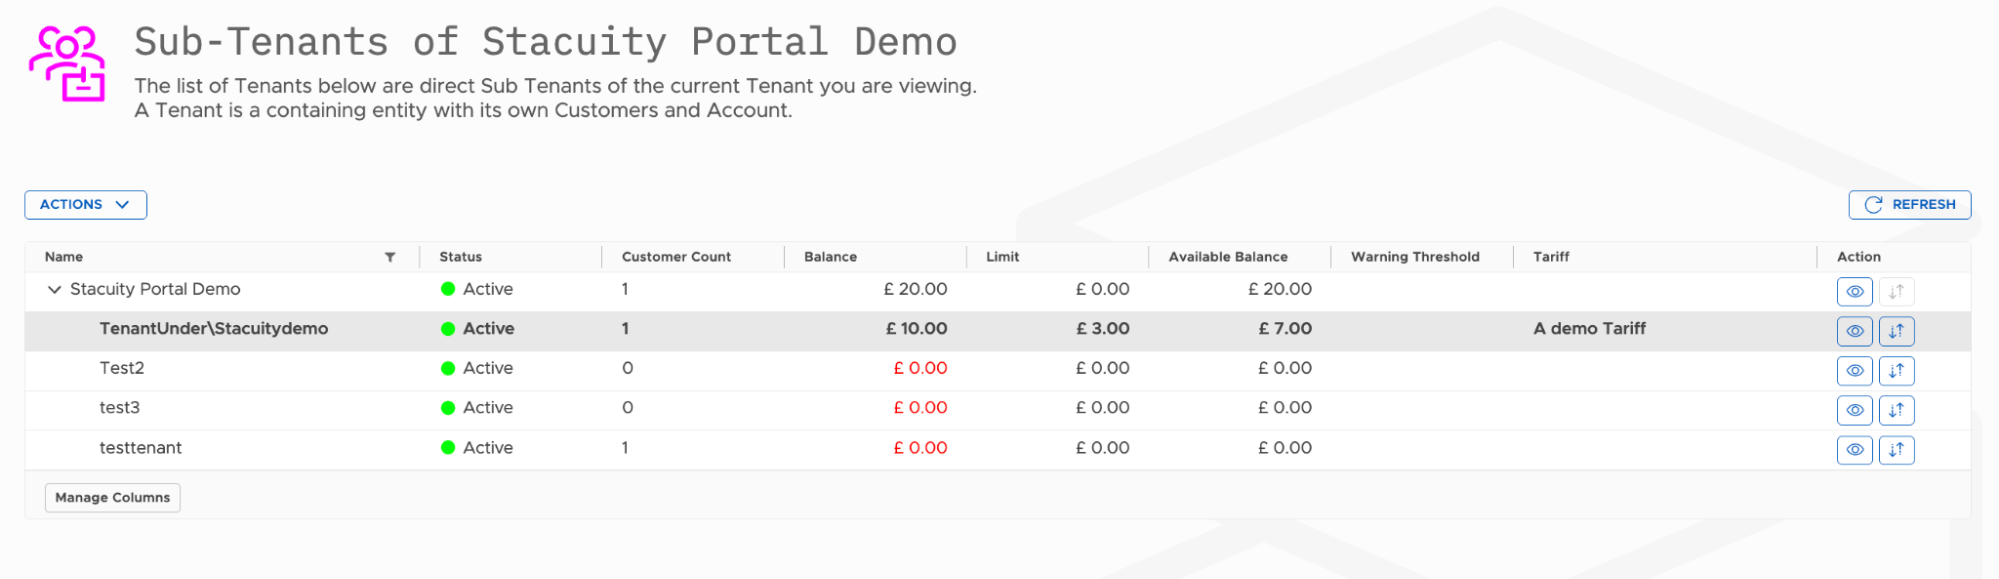
You will now be in the sub-tenant summary page.

From here you can Edit the selected sub-tenant, manage the Account, view/search the Usage and Sponsor operators.
EDIT: Change the selected Tenants definition
To Edit your tenant’s definition: click the Edit button(located just under the Tenant name). Here you can edit:
Tenant Name, Moniker, Available Subscription Types, Default Customer Tariff and Tenant Tariff as described above.
Managing the Sub-Tenant Account: Current Monetary Balance and Billing Status
Using the Account Tab, you can
- View the available balances
- Top up the credit
- Adjust the account via a Debit or Credit
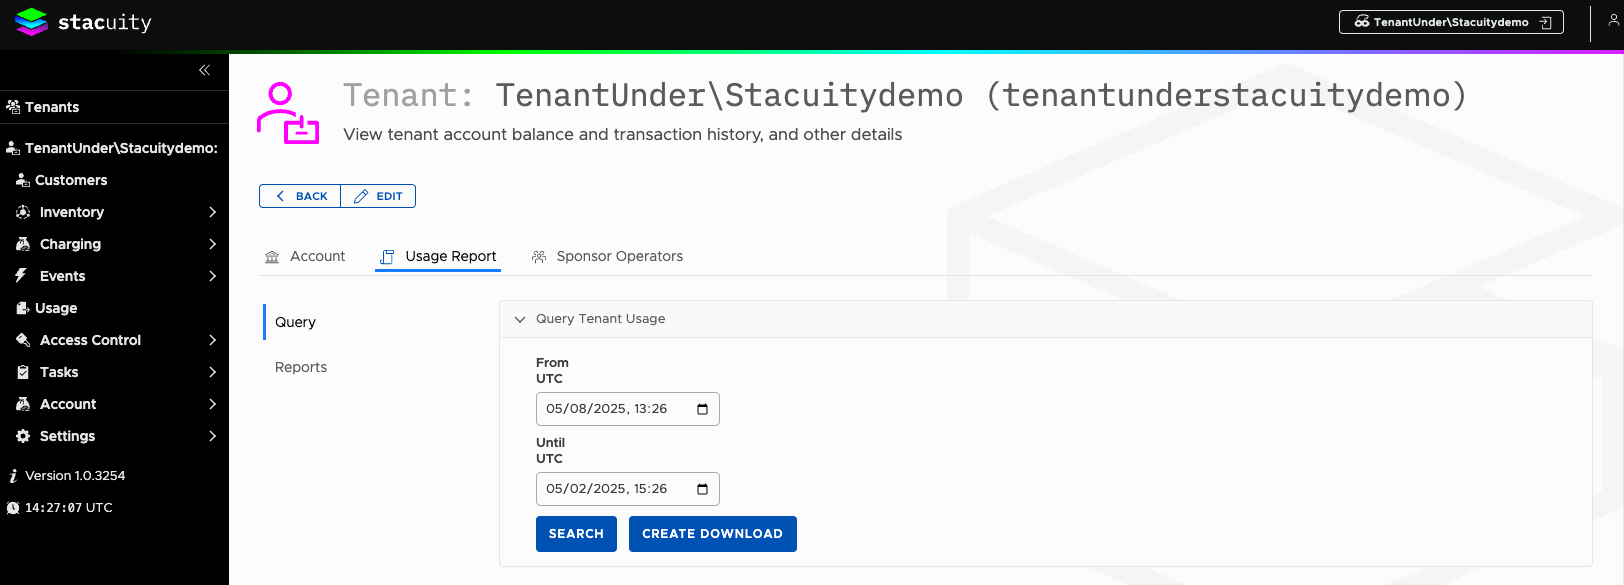
Viewing your Sub-Tenant Usage Information: Usage Information for Each Endpoint
Using the Usage Report Tab, you can
- View the usage of endpoints within a user selectable date range
- You can create this report as a download, which will appear in your reports section of the page.
- These can be downloaded to your computer for offline usage.
Updated about 1 month ago
What’s Next
Impersonating a Sub-Tenant