
Event Handlers – Define the Destination
Event Handlers define where those events should be sent. Each handler represents an external system that will receive event data.
Currently the Event Handler supported is a Webhook—a configured URL that receives an HTTP POST request whenever a matching event is triggered. The POST includes a JSON payload with details about the event.
Important: The webhook is just a delivery mechanism. Stacuity sends the payload and then moves on—it does not wait for a response or retry if the receiving system isn't ready.
Adding an Event Handler
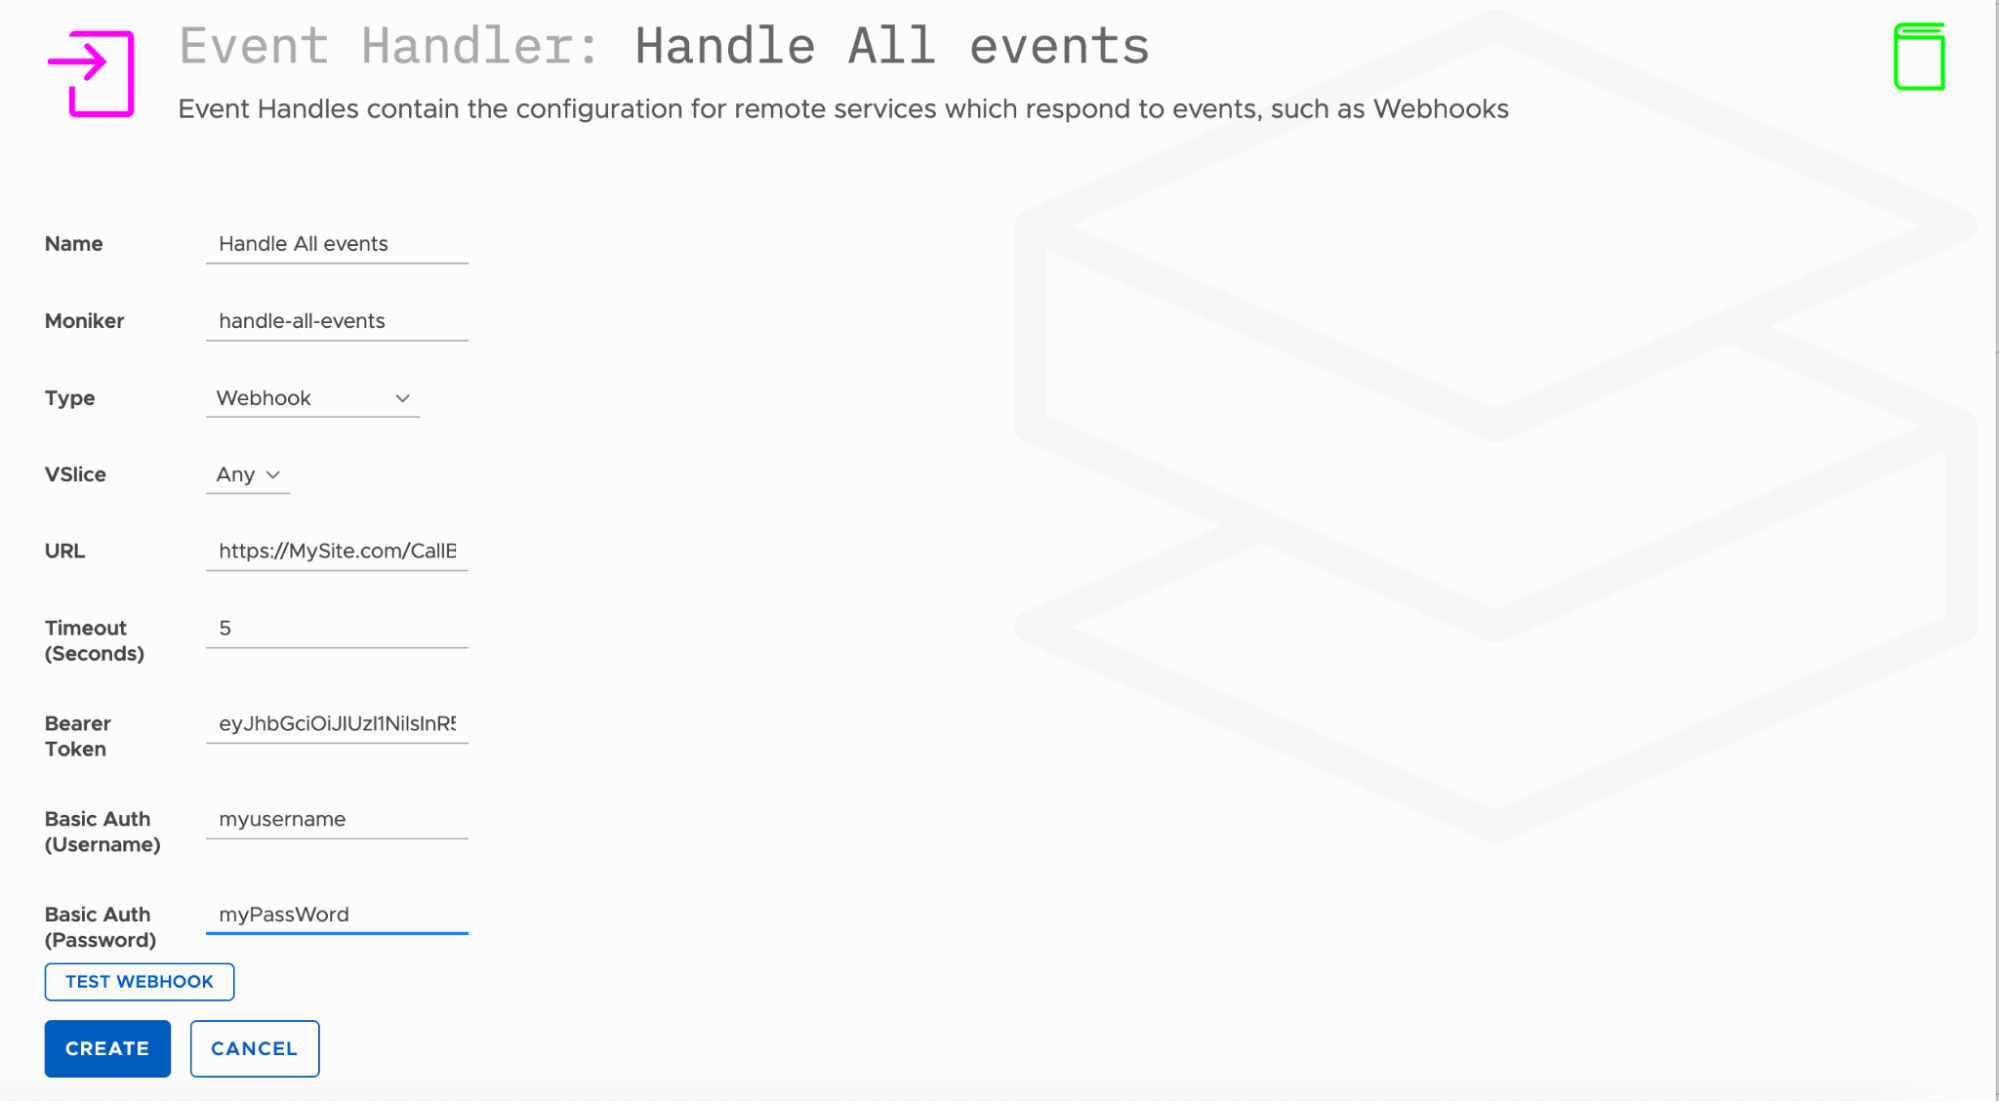
- Name your handler - Give it a descriptive name like "Handle All events" to identify what it does.
- Set the Moniker - This is a unique identifier (like "handle-all-events") used internally by the system.
- Choose the Type - Select "Webhook" from the dropdown to specify how the handler will receive events.
- Configure VSlice - Set this to "Any" to handle all event types, or choose a specific slice if you only want certain events.
- Enter the URL - Provide the endpoint where events should be sent (e.g., "https://MySite.com/CallE ").
- Set Timeout - Specify how long to wait for a response (5 seconds in this example).
- Add Authentication - (OPTIONAL) Include your Bearer Token and Basic Auth credentials (username/password) so the receiving service can verify the requests are legitimate.
- Test first - Click "TEST WEBHOOK" to verify your configuration works before saving. This will send a json with the message : “webhook test” in the body eg:
\{ "message": "webhook test" }- Create - Click the "CREATE" button to save your event handler.
Important: You are responsible for creating and managing the receiving application at your webhook URL—Stacuity only delivers the event payload to the endpoint you specify.
We also support Short Message Peer-to-Peer (SMPP)— a short message (SMS)..
Updated 11 months ago
What’s Next
Short Message Peer-to-Peer